Workflow Intent
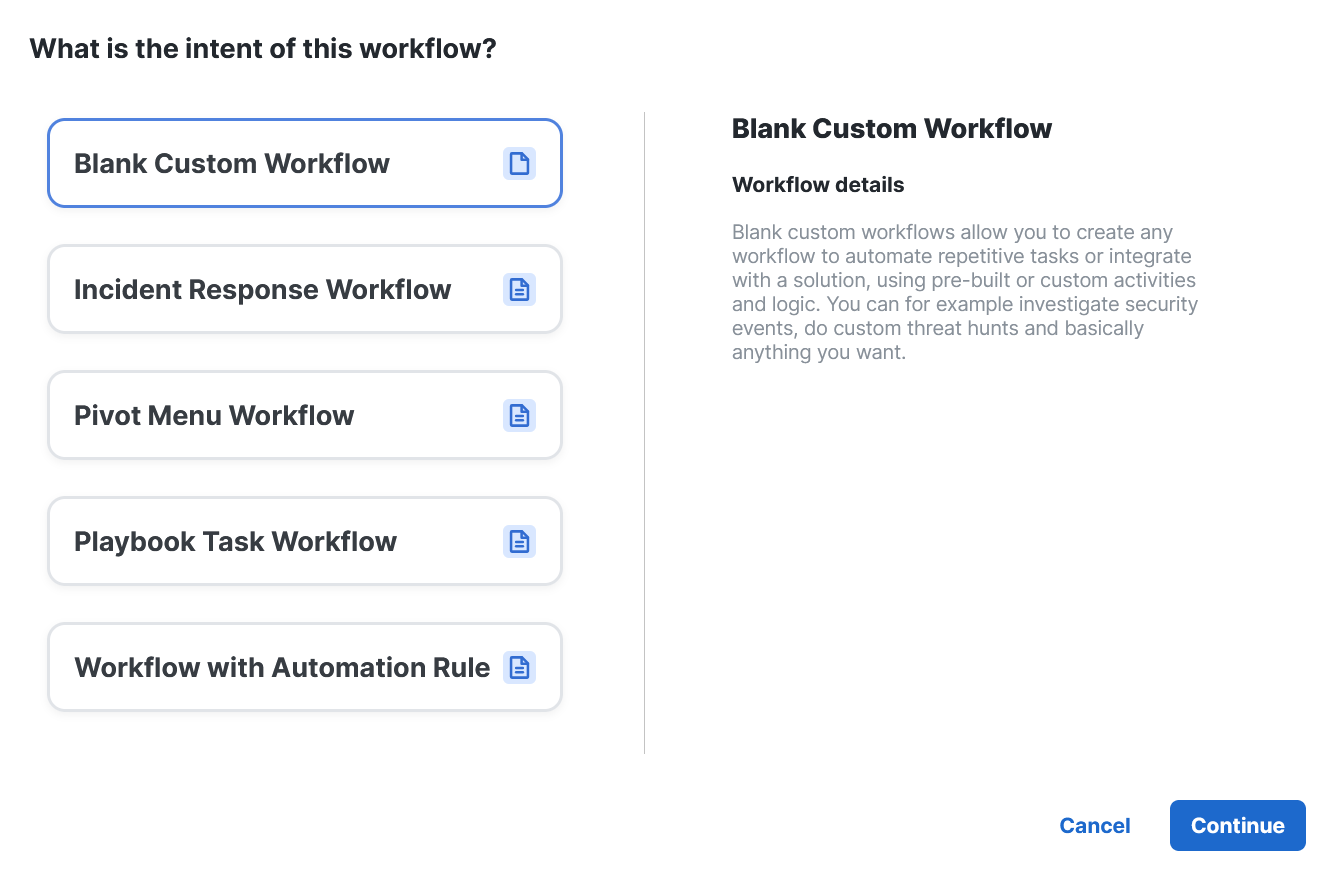
When creating a workflow, you can start with a blank workflow or choose the type of workflow to gain some configuration assistance in which the system pre-configures certain settings according to the intent of the workflow to expedite the build process.
For an existing workflow that has not been assigned an intent yet, you can open the workflow in the Workflow Editor, and in the workflow properties under the Intent Options section, choose the intent and their associated fields, or configure the Automation Rules section.
A blank workflow if you want to build from scratch and fully customize it to your particular needs.
This workflow can be used to ingest security events from a custom source, set up the required mapping to our data model of the Cisco XDR Data Warehouse, and associate an Automation Rule to trigger the workflow to execute. For more about custom security events, see Cisco Developer - Introduction to Custom Security Events.
-
Enter a descriptive name for the workflow into the Workflow display name field; a workflow must have a name before it can be saved.
-
From the Security event type drop-down list, choose the type of security event you intend to ingest, such as Email or Network.
-
From the Ingestion method drop-down list, choose how the security event will be ingested, such as by Webhook (push) for immediate delivery or Schedule (pull) for periodic polling. The push method is preferred but not supported by all sources.
-
If you chose Schedule (pull), you're shown two settings that you must configure either here now or in the workflow's properties later:
-
From the Select an HTTP target to use drop-down list, choose a new or existing HTTP endpoint target. This binds the target to the workflow and creates the module instance in the background so that the events are ingested with the correct source.
-
From the Select or create a schedule automation rule drop-down list, choose a new or existing Schedule rule, which can be used to automatically trigger this workflow to execute when configured conditions are met. For more information, see the Schedule Rule topic.
-
-
If you chose Webhook (push), you must choose a new or existing Webhook rule either here now or in the workflow's properties later. Choose a Webhook rule from the drop-down list now, and that rule gets added to the Automation Rules of the workflow's properties. Once the workflow is validated, the associated Webhook rule can automatically trigger this workflow to execute when conditions are met. For more information, see the Webhook Rule topic.
-
Click Continue to open this workflow in the Workflow Editor.
-
On the canvas is a pre-defined group of actions, which you must either Dismiss to remove or Accept (preferred) to keep, showing what's required to handle the data in security event ingestion from a custom source. The first block is getting the data in from your custom source, followed by parsing the data, and finally mapping the results to your custom schema.
-
Getting the data in - Drag and drop activity here that will pull the data from the custom source; this only appears when using the Schedule method of ingestion, since the data already gets pushed when using the Webhook method of ingestion.
-
Parsing the data - Drag and drop activity here that will parse the data and retrieve the relevant fields.
-
Mapping the data - Map variables to the parsed data. Contains a Cisco-managed atomic action such as XDR - Analytics - Ingest Email Security Event or XDR - Analytics - Ingest Network Security Event, depending on the type of security event. Click the atomic action to view its properties to the right and complete the configuration. Scroll through the list and enter required information where indicated by a red asterisk. Note that the required Module Instance ID of the integration you're communicating with and Workflow Run ID are output variable references automatically set by the system when the target was chosen.
For examples of the above, see Cisco Developer - Custom Security Event Workflows.
-
-
In the Workflow Properties, you should see under Intent Options that the Workflow Intent is set to Custom Security Event. The Security Event Type, Ingestion Type, Automation Rule Type, and Target should also be populated based on your earlier selections. The rule type cannot be removed from the workflow with this intent, and the workflow will not be executed automatically unless a validated automation rule is associated with it.
The Custom OCSF Event Source integration is automatically created and added to the My Integrations panel on the Integrations page. Findings from your Custom OCSF Event Source can contribute to incidents in Cisco XDR. You can view the security events generated by Custom OCSF Event Source integration to validate the data that is ingested by Cisco XDR for incident generation in the Detection findings tab on the Investigate page. For details, see Detection Findings. The name used in the Source Details column in the Detection findings table is the integration name and you can optionally edit the name on the Integrations page. For more information, see Integrations.
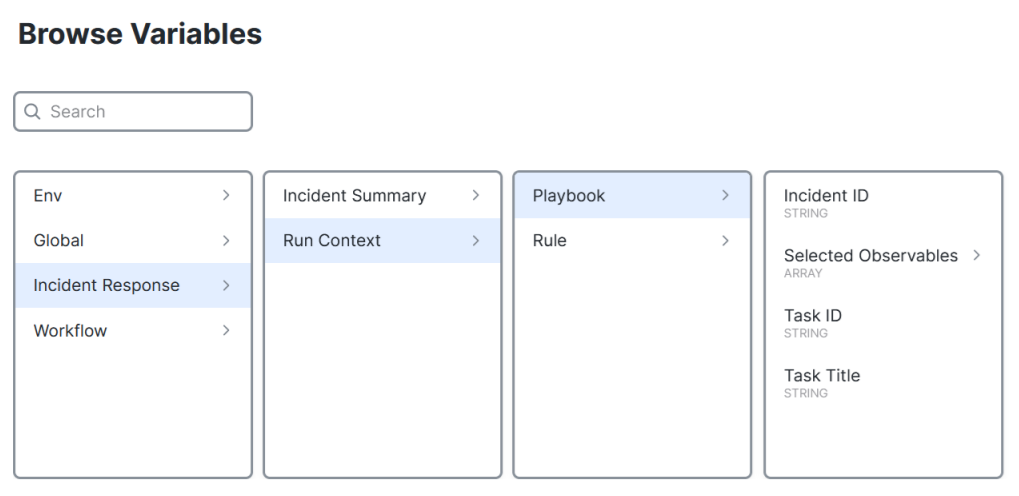
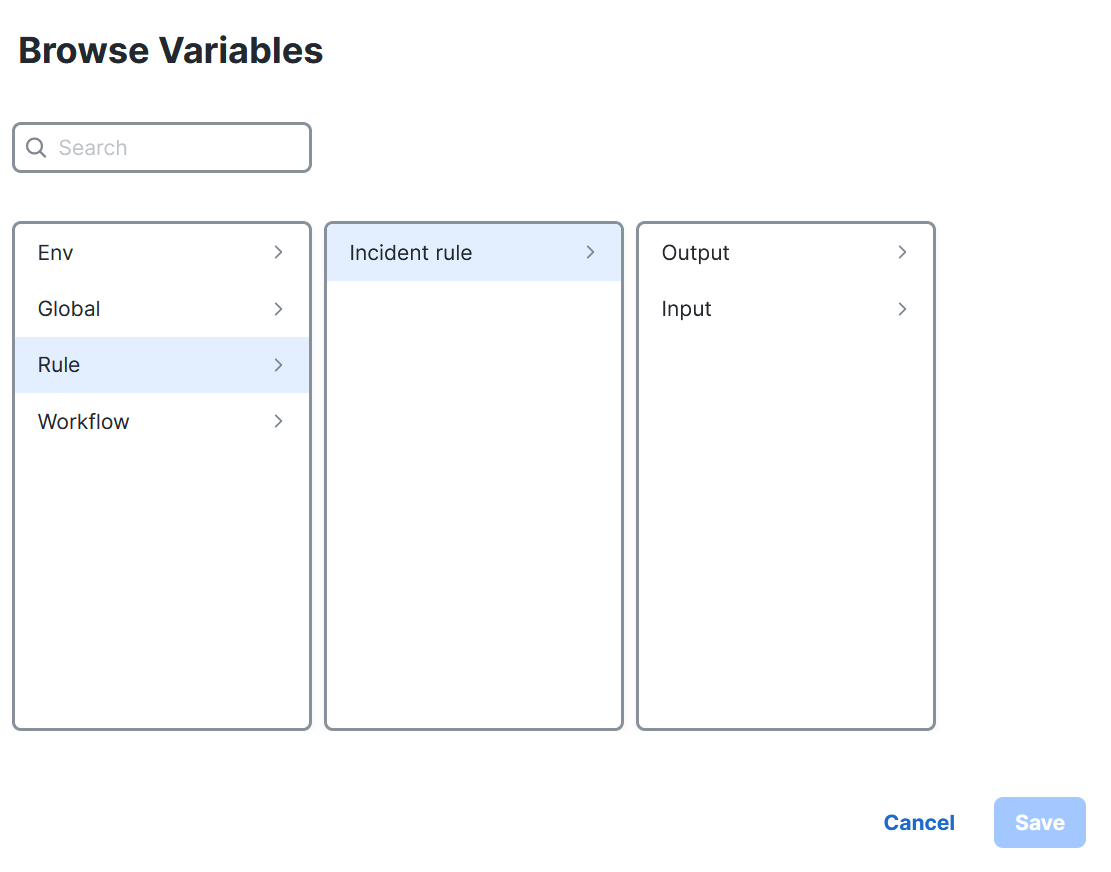
In response to incidents, this workflow can be used by playbook tasks and/or triggered to run when an incident matching an automation rule’s criteria is created in Cisco XDR. Information about the incident is passed to the workflow so that it has the context it can use to respond. Use the variable browser to see the objects under Incident Response, including incident summary and run context information for both playbook tasks and automation rules. For more information, see the Response Tasks and Playbook Editor topics.
-
Enter a meaningful display name for the workflow, and from the drop-down lists, select one or more actions (supported by the CTIM) and observable types for which this workflow is meant to act upon. If this workflow can be used for all observable types, check All. Otherwise, for generic workflows like create a ServiceNow ticket, check None to indicate that the workflow does not act upon any specific type of observable.
-
Optionally, choose an actuator to indicate what the action should be taken on (Endpoint, Network, Process, or Other).
-
Optionally, choose an incident automation rule from the drop-down list, and Automation adds that rule to the Automation Rules of the workflow's properties. Once the workflow is validated, the associated incident automation rule can automatically trigger this workflow to run. For more information, see the Incident Response Rule topic.
-
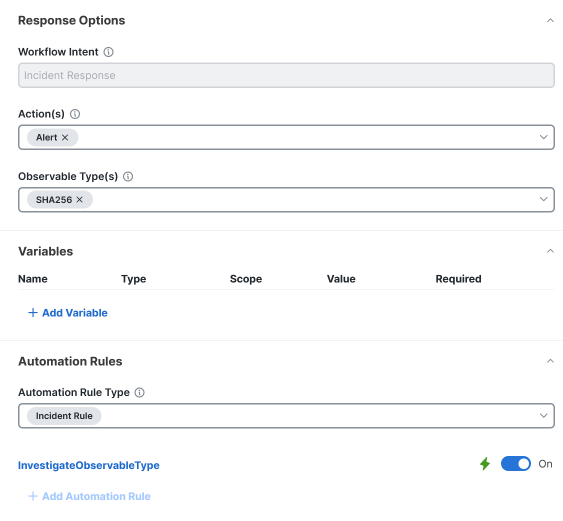
Click Continue to open this workflow in the Workflow Editor, and in the Workflow Properties, you should see under Intent Options that the Workflow Intent is set to Incident Response. The Action(s), Observable Type(s), and Actuator should also be populated based on your earlier selections. Additionally, the Automation Rule Type is set to Incident Response Rule.
The Incident Response Rule type cannot be removed from a workflow with the intent of responding to an incident.
And the workflow will not be executed automatically unless a validated automation rule is associated with it.
-
On the canvas is a pre-built block of actions, which you must either Dismiss to remove or Accept (preferred) to keep, including an activity to perform for each observable, and a condition block to verify if it was successful. In turn, you should update the variables Workflow Result and Workflow Result Code in the condition branches to provide feedback to the workflow user with information about the workflow execution.
For incident response workflows, Workflow Result is automatically added to the incident's worklog after the run completes, and Workflow Result Code is automatically used to set the status of a playbook task. For more information, see the Workflow Variables - Workflow Result topic.
An example that uses both variables is if the incident response workflow ran successfully, but because of an error, it was only able to partially complete its intent. You can use the Set Variables core activity to both set the Workflow Result Code property to "partially-completed" and add context information using the Workflow Result property.
Enables you to take response actions from an observable throughout Cisco XDR. Pivot menus appear in investigations, incidents, and the Cisco XDR ribbon.
-
Enter a meaningful display name for the workflow.
-
Select one or more observable types from the drop-down list that this workflow was built to work with. Only the pivot menu of the observable type(s) you've chosen here will show this workflow available to execute.
-
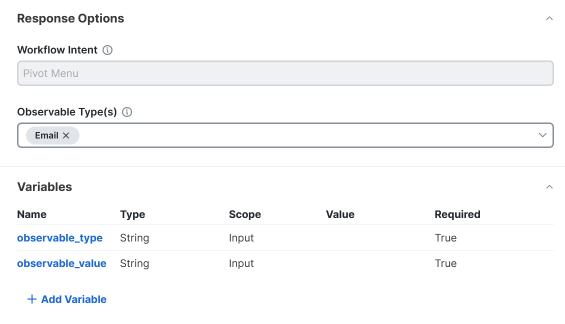
Click Continue, and Automation adds your selections to the Response Options section of the workflow properties, along with some sample variables (string input observable_type and observable_value) and actions to the workflow. The observables this workflow can work with can be updated here, as needed.
-
Once it's validated, the workflow is added to the pivot menu of any observable throughout Cisco XDR matching the type(s) you selected.
In order for a workflow to appear in pivot menus, it must have a Workflow Intent of Pivot Menu under Response Options and be in a validated state. For more information, see the Workflow Editor topic.
This workflow is designed to be used by playbook tasks and/or incident automation rules. After you configure this workflow, you’re able to select it from the Playbook Editor when editing a task. For more information, see the Response Tasks and Playbook Editor topics. Go to the incident's Response page and you'll see this workflow with the playbook tasks. Go to the Worklog to view the workflows and links to their runs.
-
Enter a meaningful display name for the workflow, and from the drop-down lists, select one or more actions (supported by the CTIM) and observable types for which this workflow is meant to act upon. If this workflow can be used for all observable types, check All. Otherwise, for generic workflows like create a ServiceNow ticket, check None to indicate that the workflow does not act upon any specific type of observable.
-
Optionally, choose an actuator from the drop-down list to indicate what the action should be taken on (Endpoint, Network, Process, or Other), and Automation will add it to the Actuator of the workflow's properties.
-
Click Continue to open this workflow in the Workflow Editor, and in the workflow properties, you should see under Response Options that the Workflow Intent is set to Playbook Task. The Action(s), Observable Type(s), and Actuator should also be populated based on your selections.
-
On the canvas is a pre-built block of actions, which you must either dismiss or accept, including an activity to perform for each observable, and a condition block to verify if it was successful. In turn, you should update the variables Workflow Result and Workflow Result Code in the condition branches to provide feedback to the workflow user with information about the workflow execution.
Automation rule workflows are triggered to run when conditions for the rule are met in Cisco XDR. Information is passed to the workflow so that it has the context it can use to respond. For more information, see the Automation Rules topic.
-
Enter a meaningful display name for the workflow.
-
Select one or more rule types from the drop-down list. While designing the workflow, you don't have to associate it with an automation rule yet, as you can refer to the variables in a generic fashion.
-
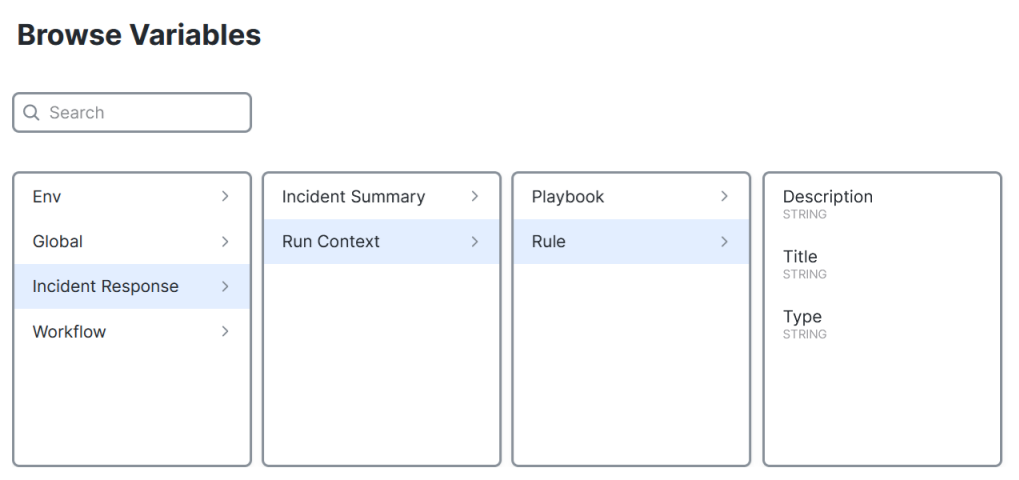
After the workflow is assigned an automation rule type, you'll have access to various rule-related data under the Rule object in the variable browser.
-
In order to run the workflow, go to the Workflow Properties and add one or more automation rules. For more information, see the Workflow Editor topic.
Note that all automation rules associated with a workflow are exported with the workflow. So after you finish your work using the workflow, don't forget to remove it from any automation rules. Otherwise, all associated automation rules are exported alongside the workflow, which is unwanted behavior. All you need to do is keep the Automation Rule Type assigned.
