Workflow Editor
Click New Workflow or on an existing workflow to open the Workflow Editor, a drag-and-drop editor that enables you to build simple to complex workflows.
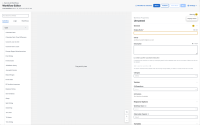
The Workflow Editor is comprised of three sections:
- Activities - This (left) panel contains the building blocks and individual functions you can add to a workflow. Activities include actions based on API calls to your integrated products, logic components, and other workflows.
- Workflow Canvas - This (middle) panel is where you build the structure and set the actions, order, and logic for a workflow. Drag and drop items from the Activities panel to here to add them to a workflow. You can drag and drop items on the canvas to change their location and order in the workflow.
- Properties - This (right) panel includes the properties of the workflow itself as well as those for each activity on the Workflow Canvas.
This toolbox contains objects that you can add to a workflow to provide functionality.
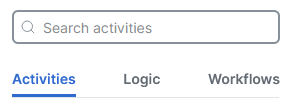
The Activities panel includes three sections:
- Activities - Built-in and third-party functions that you can use to perform actions. Expand the various sections and then drag and drop the actions you want to use in your workflow. See the Activities Help topic for more information.
- Logic - Logic components add flexibility and branching to your workflows by allowing you to add elements such as groups, conditions, and loops. See the Logic Activities Help topic for more information.
- Workflows - You can add other existing workflows as child objects to nest within your parent workflow. This allows you to create smaller, targeted workflows that you can then incorporate and piece together as needed to achieve more complex objectives.
The Workflow Canvas is where you construct the workflow using objects from the Activities panel.
Drag and drop each item onto the canvas where you want it to be in the workflow, wherever a green plus icon appears. You can drag each item within the workflow to rearrange the order.
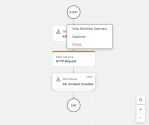
Hover over an object on the canvas and click the ![]() (Ellipsis) icon to see its actions menu. Available actions include:
(Ellipsis) icon to see its actions menu. Available actions include:
-
View Workflow Summary - Open a dialog box showing the object name, description, and other information such as variables.
-
Duplicate - Copy the object and its configured properties.
-
Delete - Remove the object from your workflow.
The Properties panel is where you define the attributes of the workflow itself and of any activities within the workflow.
-
You must configure properties for each workflow activity.
-
Click the activity to see and define its properties.
-
The required properties will vary depending on the activity.
In addition to the display name (64 character limit), owner, and description (1024 character limit) of the workflow, this area includes options to clean up after the workflow successfully runs, mark the workflow as an atomic, and tag the workflow with a category. For more information, see the Categories Help topic.
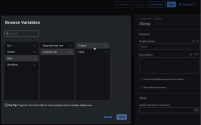
Tables for input variables, output variables, and local and static variables list any required values you want to store and share among activities or workflows. To delete a variable from its table, hover over the row of the variable and the trash can icon appears. The variables are listed alphabetically within their table. The order of the variables is retained when execution of the workflow is initiated and in the JSON when the workflow is exported. For more information, see the Variables Help topic.
Variable references are displayed as pills in the UI fields. The length of text in each pill is reduced by generally concatenating the properties. Hover over a pill to display a tooltip showing its full path of breadcrumbs. For a broken reference, the pill says “Reference not found” and the tooltip on hover shows the full, raw reference link with the underlying data.
You can choose the intent of the workflow, such as it will be used in response to an incident or actionable from the pivot menu of an observable in Cisco XDR. Note that this change cannot be undone.
You can specify an observable type here and thereby filter which workflows appear in an observable's pivot menu. This ensures that the workflow can be easily found and run from the action pivot menu of a matching observable. This should also eliminate issues where you try to execute a workflow not built for the selected observable type and it fails. For more information, see the Create a Workflow Help topic.
Determine when this workflow is automatically executed and what type(s) of rule this workflow belongs to. For more information, see the Triggers Help topic.
- Select one or more rule types from the drop-down list, then when using the variable browser, you can add generic references to variables per rule type, instead of having to do so for each specific rule, adding flexibility to reusing and sharing content. When you create a workflow with generic references, it's easier to reuse the workflow for multiple rules. And when you share a workflow with generic references, it's easier to import it without having to import each specific rule.
- If you want this workflow to start in response to a schedule or when an incident or specific event occurs, click Add Automation Rule. In the resulting dialog box, select the name of the existing (or click Add New) rule, and click Select. Edit the rule as needed, and click Save to add it to the workflow's list of associated automation rules. For more information, see the Automation Rules Help topic.
- When a rule's toggle is switched to on, the association between the rule and this workflow is activated, so that this workflow is enabled to automatically run when the rule conditions are met.
You can use the Workflow Editor to export a workflow to a Git repository for storage. For more information, see the Import and Export a Workflow Help topic.
If and when this workflow was published to Exchange, including version number and link to view its details in Exchange. For more information, see the Publish to Exchange Help topic.
Targets and target groups define the systems and resources that the workflow will communicate with or act upon. For more information, see the Targets Help topic.
For targets that require authentication, account keys are used. For more information, see the Account Keys Help topic.
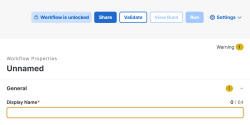
The header of the Workflow Editor page shows whether the workflow is unlocked, locked, or production-ready:
-
Unlocked - The workflow is currently unlocked and can be edited. To lock it and prevent changes from invalidating it, click Unlocked, switch the Lock workflow toggle to on, enter a Lock message about why this workflow is locked (for example, "Workflow is being used with one or more automation rules, so editing it may invalidate it and prevent the associated rules from running. Duplicate this workflow before modifying it."), and click Save.
-
Locked - The workflow is currently locked and cannot be edited. To unlock it so that it can be changed, click Locked, review the Lock message, switch the Lock workflow toggle to off, and click Save. Unlocking a workflow also automatically switches the Production ready toggle to off.
-
Production ready - In order to switch the Set as Production ready toggle to on and enable the workflow to be used in playbook tasks, these conditions must be met:
-
The workflow must be validated and locked.
-
The workflow must have a description, and any input or output variables must also have descriptions.
-
The Target must not be set to the Specify target on workflow start option.
-
Workflows are automatically locked when:
-
The workflow is published to Exchange. If you'd like to make changes to the workflow, you can unlock and edit it. Then, you can publish the update to Exchange.
-
The workflow was installed from Exchange. If you'd like to make changes to the workflow, you can unlock and edit it. However, if you edit the workflow and choose to install an update later, your changes will be overwritten. Consider duplicating the workflow before making changes.
-
The workflow is used by one or more automation rules. If you'd like to make changes to the workflow, you can unlock and edit it. However, workflows must be in a valid state to be run by automation rules. So while you're editing it, the workflow is invalid and will not be executed by any automation rules. Consider duplicating the workflow, making your changes to the copy, and then updating the automation rule(s) to use the new version.
-
The workflow is used by another workflow. If you'd like to make changes to the workflow, you can unlock and edit it. However, workflows must be in a valid state to be run. So while you're editing it, the workflow is invalid, and any workflows using it may not be able to run. Consider duplicating the workflow, making your changes to the copy, and then updating the parent workflow with the new version.
-
Note: As a user with an Administrator role, you can lock or unlock any workflow in your tenant, whether you're the author or not.
The page header also includes the following functions:
- Share -
- Submit to Exchange - Submit the validated workflow for publishing to Exchange.
- Commit to Git - Export the workflow to a Git repository; you must select a Git repository in the properties before you can commit the workflow.
- Export as JSON - Export the workflow as a JSON file; copy the resulting JSON to your clipboard, or save it to a local file.
- Add to Playbook Task Catalog - Add the workflow to the task catalog to be used in an incident response playbook. The workflow must be valid, have the Incident Response or Playbook intent, and be set to Production ready. Enter a task name, summary, and description.
- Validate - Check that a workflow and activities have all of the necessary properties defined in order to run successfully.
- View Runs - View the execution data for the workflow on the Runs page.
- Run - Perform a single execution of the workflow.
- Settings - Modify the settings for the Workflow Editor; you can hide the Activities or Properties panels, select whether or not to receive a confirmation dialog when you delete activities or unlock a workflow, collapse property sections, show inline suggestions.
