Playbooks List
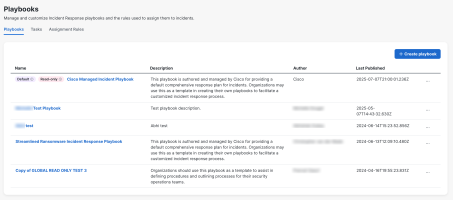
The Playbooks tab is displayed by default and shows the custom playbooks that have been created for your organization. You use this tab to manage and customize playbooks used by your organization.
The table in the Playbooks tab displays the name of the playbook, description, who authored it, the date and time the playbook was last published, and actions that can be taken. One playbook must always be assigned as the default, which is assigned to new incidents when no other playbook is assigned through an automation rule.
When you initially open the Playbooks tab, only the Cisco Managed Incident Playbook is displayed. This playbook is currently assigned to all new incidents. The Cisco Managed Incident Playbook cannot be edited or deleted; you can only edit or delete a duplicate copy of this playbook.
The Cisco Managed Incident Playbook is based on best practice for incident response processes, as described by the SANS Institute. It aligns to the NIST 800-61r2 model format (Preparation, Detection and Analysis, Containment, Eradication, Recovery, and Post-incident) produced by SANS Cybersecurity Training Organization. Preparation and Lessons Learned (Post-incident) have been intentionally removed from this playbook. Preparation defines the tasks that should be done prior to instituting a response process. Lessons Learned is directly related to Preparation, as the activities from Lessons Learned should be implemented into preventative and protection strategies.
From the Playbooks tab, you can perform the following tasks:
Click the (Sort) icon in the column headers in the Playbooks table to sort the playbooks alphabetically or in ascending or descending order.
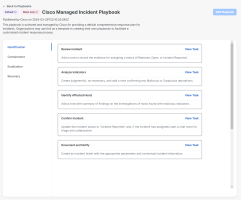
You can view the tasks included in each playbook from the Playbook Details page.
Perform the following steps to view the tasks in a playbook:
-
Choose Administration > Playbooks in the left navigation menu.
-
In the Playbooks tab, click the playbook Name to open the Playbook Details page.
-
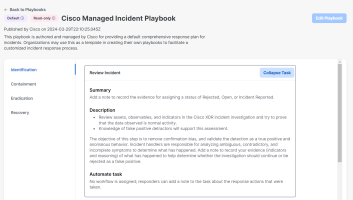
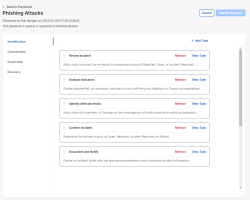
Click the task name to view the summary, description, Automation workflow assigned in the task drawer. The details of the workflow, including the Actions that this workflow can perform, Observable types the workflow is designed to run on, and Actuator of the workflow (if applicable) are displayed in the lower portion of the drawer. For details, see Workflow Intent.
You can create a new playbook in the Playbooks tab. Up to 25 custom playbooks can be created per organization with one playbook always set as the default. Each phase in the playbook requires at least one task with a maximum of 50 tasks.
Note: Only users with the Administrator role are allowed to create playbooks.
Perform the following steps to create a new playbook:
-
Choose Administration > Playbooks in the left navigation menu.
-
In the Playbooks tab, click Create playbook.
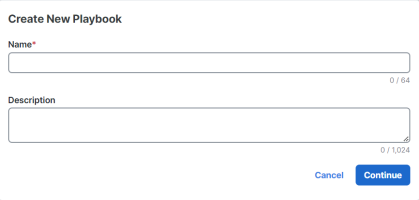
- Enter a Name (required) and Description (optional) for the playbook.
- Click Continue.
-
Click Add Task to open the Tasks drawer and you can check the check boxes of the custom tasks you want to add to the playbook. The tasks are managed in the Tasks tab. For details, see Tasks. The check box is dimmed if the task is already associated with the playbook.
Use the Search text box in the upper portion of the drawer to narrow the display of tasks. Enter the search criteria in the Search text box to search for tasks by name. The tasks that match your search criteria are displayed in the list below.
Check the Hide Cisco managed tasks check box to hide the tasks that are managed by Cisco and display custom tasks only.
You can click the
(Sort) icon in the Tasks column header to sort the tasks alphabetically.
- Click Add tasks to playbook.
- Continue adding up to 50 tasks, as needed, for each response phase.
- To rearrange the tasks on the page, click the
(Grabber) icon and drag the task to the desired position.
- To delete a task, click Remove.
- To view the task, click the task to display the task details in a drawer.
- To rearrange the tasks on the page, click the
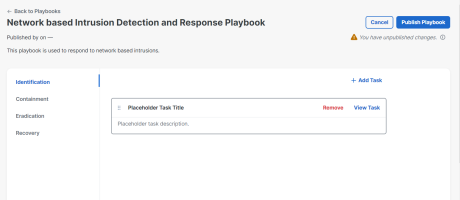
- When you have completed adding tasks, click Publish Playbook.
- On the Confirm Publish Playbook dialog box, click Publish.
Note: If you navigate away from the form while editing, the form is automatically saved as a draft for the current browser tab only. The draft content is not available if the same session of Cisco XDR is opened in another browser tab. To restore the content, return to the form and continue with your edits or click Undo or Use draft to remove or restore the draft content.
The four phases of the response playbook are displayed as tabs in the left panel (Identification, Containment, Eradication, and Recovery). Each phase requires at least one task, with a maximum of 50 tasks.
Note: Playbook content does not get updated in incidents that already have a playbook assigned to it. A new playbook can only be assigned to incidents that are created after the playbook has been published, either by setting the new playbook as a default playbook or creating an assignment rule to assign the playbook to a new incident when certain conditions are met.
Use the Edit feature to modify the tasks in a playbook. Each phase in the playbook can include up to 50 tasks.
Note: Only users with the Administrator role are allowed to edit playbooks.
Perform the following steps to edit a playbook:
-
Choose Administration > Playbooks in the left navigation menu.
-
In the Playbooks tab, click the playbook Name to open the Playbook Details page.
-
Click Edit Playbook to enable editing mode.
Note: If you navigate away from the Playbook Details page while editing the description or task, the content is automatically saved as a draft for the current browser tab only. The draft content is not available if the same session of Cisco XDR is opened in another browser tab. To restore the content, return to the content and continue with your edits or click Undo or Use draft to remove or restore the draft content.
- To edit the playbook name or description, hover over the text and click the
 (Edit) icon and enter a new name and description for the playbook.
 - To add a task, click Add Task to open the Tasks drawer and you can check the check boxes of the tasks you want to add to the playbook. The tasks are managed in the Tasks tab. For details, see Tasks. The check box is dimmed if the task is already associated with the playbook.
Use the Search text box in the upper portion of the drawer to narrow the display of tasks. Enter the search criteria in the Search text box to search for tasks by name. The tasks that match your search criteria are displayed in the list below.
You can click the
(Sort) icon in the Tasks column header to sort the tasks alphabetically.
- Click Add tasks to playbook.
- Continue adding up to 50 tasks, as needed, for each response phase.
- To rearrange the tasks on the page, click the
(Grabber) icon and drag the task to the desired position.
- To delete a task, click Remove.
- To view the task, click the task to display the task details in a drawer.
- To rearrange the tasks on the page, click the
- When you have completed editing the playbook, click Publish Playbook.
- On the Confirm Publish Playbook dialog box, click Publish.
Note: Playbook content does not get updated in incidents that already have this playbook assigned to it. Changes to a playbook only apply to new incidents that are created after the updated playbook has been published.
You can copy an existing playbook and modify the name, description, and tasks to customize it for your organization. You may want to use this option when you want to reuse some of the content in an existing playbook instead of creating a completely new playbook.
To create a duplicate copy of a playbook, click the ![]() (Ellipsis) icon for the playbook you want to copy in the playbooks list and choose Duplicate from the drop-down menu. A copy of the playbook is added to the Playbooks tab with Copy appended to the playbook name.
(Ellipsis) icon for the playbook you want to copy in the playbooks list and choose Duplicate from the drop-down menu. A copy of the playbook is added to the Playbooks tab with Copy appended to the playbook name.
Click the newly copied playbook name to open the Playbook Details page and customize it. See Edit a Playbook for instructions.
Note: Only users with the Administrator role are allowed to duplicate playbooks. Up to 25 custom playbooks can be created per organization with one playbook always set as the default. Each phase in the playbook can include up to 50 tasks.
There must always be one playbook specified as the default. Initially the Cisco Managed Incident Playbook is set as the default. Whenever, an incident does not match the conditions in an assignment rule, the default playbook is assigned to the incident.
To specify the default playbook, click the ![]() (Ellipsis) icon for the playbook you want to make default in the playbooks list and choose Set as Default from the drop-down menu. The Default badge is displayed next to the playbook name.
(Ellipsis) icon for the playbook you want to make default in the playbooks list and choose Set as Default from the drop-down menu. The Default badge is displayed next to the playbook name.
Alternatively, you can click the playbook Name in the Playbooks tab and then click Set as default playbook on the Playbook Details page.
You can delete any custom playbook as long as it's not set as the default playbook (the Cisco Managed Incident Playbook cannot be deleted).
To delete a playbook, click the ![]() (Ellipsis) icon for the playbook you want to delete in the playbooks list and choose Delete from the drop-down list. Click Delete on the confirmation dialog box.
(Ellipsis) icon for the playbook you want to delete in the playbooks list and choose Delete from the drop-down list. Click Delete on the confirmation dialog box.
Note: The Delete option is not available for the Cisco Managed Incident Playbook or the playbook that is set as the default.
