Notifications
Use the Notifications page to view and manage the following notifications:
-
Incidents assigned to you by other users.
-
Approval tasks from Automation assigned to you by other users.
-
System event has occurred in Automation that may impact service (for example, workflows, rules, or runs that are temporarily disabled or canceled by the system) or updates to an Automation target due to an integration change.
-
Prompt tasks from Automation assigned to you by other users.
-
Automation workflows that you submitted are approved or rejected by the content moderator for publishing to Exchange.
To access the Notifications page, choose Administration > Notifications in the navigation menu.
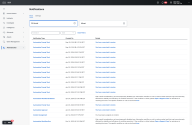
The Inbox tab is displayed by default and it lists all your current notifications. High-level summary metrics are displayed in the upper portion of the page that shows the total number of Unread and Read notifications. Click any of the cards to filter the list of notifications based on the status.
The notifications list includes the type of notification, details of the notification, and when the notification was created. An Unknown notification type indicates that the type of notification is undefined.
When you click a notification in the list, a drawer opens where you can view the notification type and details. Each notification type displays the following:
-
Incident Assignment - The notification title, which product reported the incident with a link that opens the source of the incident in a new tab (if applicable), timestamp of the incident, and an incident title link that displays the incident details on the Incident Details page. See Incidents for more information on incidents.
-
Automation Approval - The notification title, type of notification, and a link to the task details for more information and to approve or reject the request. For more information, see Tasks.
-
Automation Prompt Task - The notification title, type of notification, and a link to review the prompt task details for more information and to respond to the request. For more information, see Tasks.
-
Automation Exchange - The notification title, type of notification, and a link to the workflow in Exchange.
-
Automation System Event - The notification title, type of notification, and description of the event.
Mark Notifications as Read or Unread
If the notification is unread, click Mark as Read to change the status of the notification to read and the notification is moved to the Read notifications list. If the notification is marked as read, click Mark as Unread to change the status of the notification to unread and the notification is moved back to the Unread notifications list.
Remove Notifications
Click Dismiss to remove the notification from the Notifications page and the Notifications popup.
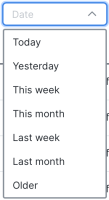
By default, all the unread or read notifications are displayed in the list of notifications. You can search, filter, and sort the notifications to display only those notifications you want to view. Click Clear Filters to remove the search criteria and filter.
Enter the search criteria in the Search field on the Notifications page to search for notifications by type, details, or title. The notifications that match your search criteria are displayed in the list of notifications.
Click the (Sort) icon in the column headers in the Notifications table to sort the notifications alphabetically or by ascending or descending order.
-
Notification Type - Sort the notifications alphabetically.
-
Created On - Sort the notifications by newest to oldest or oldest to newest.
You can set up your notifications to receive an email and/or send an instant message through Webex based on the notification type in the Settings tab. If you want to send a notification through the Webex messaging application, ensure that the Webex integration is configured on the Integrations page. For details on how to add an integration, see Integrations.
The notification types are listed in a table with the following information:
-
Status - Displays Customized if the setting for the notification type has been configured. Otherwise, the Default status is displayed.
-
Notification Type - Displays the type of notification (Automation Approval, Automation Exchange, Automation Prompt, Automation System Event, or Incident Assignment).
Note: The Automation System Event notification type is only available to users with an Administrator role.
-
Description - Displays a brief description of the notification type.
-
Category - Indicates whether the notification is a Personal notification that affects the user only (for example, Incident Assignment) or a System notification that affects the organization (for example, Automation System Event).
Click the (Sort) icon in the column headers to sort the list alphabetically.
To configure the notification settings:
-
On the Notifications page, click the Settings tab.
-
Click Edit for the notification type you want to configure.
-
You can enable one or more of the following options:
Note: The In-App toggle is enabled by default and it cannot be disabled.
-
Email - Click the Email toggle to enable the setting and receive an email when a notification is sent to you. The email is sent to the email address used to sign in to the current Cisco XDR account. For details, see My Account. The Email toggle is enabled by default for Automation Approval and Incident Assignment notification types.
-
Instant Message - If you have Webex integration and/or Slack integration configured on the Integrations page, the available Webex and/or Slack instances are listed in the Instant Message area and you can configure the Webex and/or Slack settings to send a message to the configured person, space, user, or channel when a notification is sent to you.
Note: If you are using Slack to send a message, you must ensure that the Slack integration is configured with the following OAuth scopes: users:read, channels:read, groups:read, im:read, mpim:read, and chat:write.
Check the name of the Webex or Slack integration check box and enter the name of the person or space in the Webex Conversation or Spaceor Slack User or Channel drop-down menu to search for the person or space in the specified Webex or Slack instance.
Note: When searching for a person or user, you cannot use an email username in the search box.
The people, spaces, users, or channels that match your search criteria are displayed. Check the check boxes next to the person, space, user, or channel you want to add. If there is an error with the Webex or Slack integration configuration, an error badge and message is displayed with a link to fix the configuration on the specific Webex or Slack Edit Integration page in a new tab.
-
-
Click Save.
The status of the notification is updated to Customized to indicate that a change has been made to the setting for the notification type. If Email is enabled, you will receive an email from no-reply@security.cisco.com when you receive a new notification with details of the notification. If an instant message is configured, a notification is sent from the Webex or Slack bot to the configured person, space, user, or channel when you receive a notification.


