Casebook App
The Cisco XDR casebook app in the ribbon or ribbon extension is a powerful and convenient tool for creating, saving, editing, and sharing your cases across the Cisco Secure portfolio and anywhere you go in your browser.
A case is a data structure that allows you to gather and group observables and related analyst notes in one place from across multiple products for easy retrieval and further actions. For example, you can group a list of observables known to be associated with a specific reported threat or a list of observables known to be associated with an endpoint of interest. You can then retrieve that case later and have the set of observables and your records immediately at hand.
A case does not include dispositions, events, or other temporal or enrichment-based information. It is primarily a container for observables so that all of the observables in the case can be investigated quickly or added to incidents. You can optionally include any analyst notes to the case as you follow leads during your threat investigation.
From within the casebook app you can see current dispositions on the observables in the case and launch investigations or take other research or response actions on them, as provided by your Cisco XDR integrations.

All panels in the casebook app are collapsible to customize your view of the selected case.
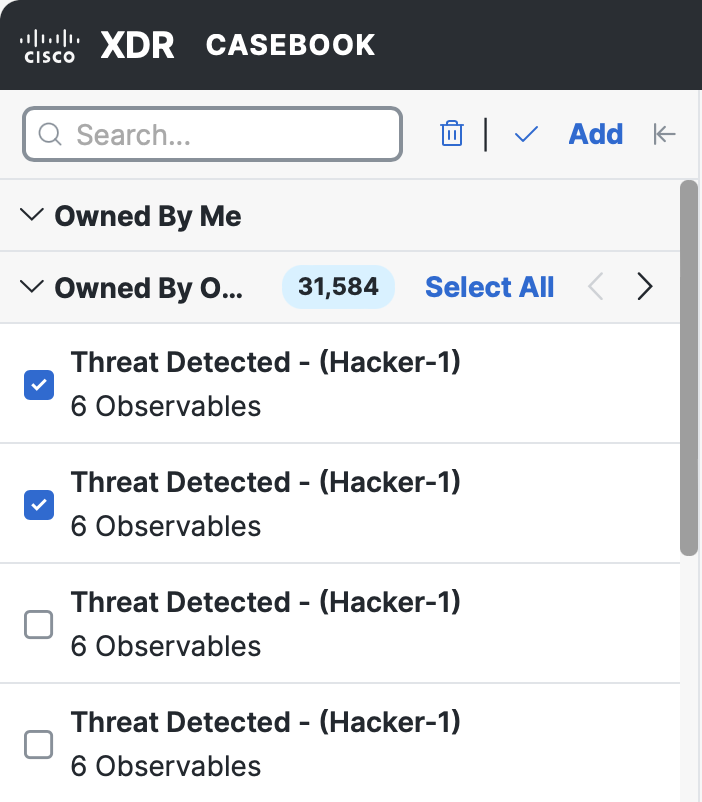
When you open the casebook app, all of the cases are displayed in the left Cases panel. You can search and sort the case list to easily locate a case. You can also collapse this panel to customize your view of the selected case. You can hover over the casebook title and click the ![]() (Edit) icon to change the title.
(Edit) icon to change the title.
Information about the case is displayed in the following panels:
The Overview panel provides details about the case and lists any incidents that have been linked to it.
-
Details - Includes the created date and time, name of person who created case, and a summary of the case. Hover over the summary and click the
 (Edit) icon to change the summary; edits are auto-saved.
 -
Linked Incidents - Includes the incidents that have been linked to the case. Click a linked incident to open the incident in the incident app. For more information, see Incidents App.
The number of observables included in the case are shown in this panel, with the total number displayed next to the header.
Expand the observable to access filtering options and the Pivot menu.
Click the Pivot menu next to the observable to Run Investigation, Create Judgment, Add to a new case, Add to active case, or perform additional tasks in the integrated products. See Pivot Menu for more information.
Use the Notes panel to add any notes about the case.
Click the ![]() (Edit) icon to open the Write and Preview options. The panel accepts Markdown formatting. Click the
(Edit) icon to open the Write and Preview options. The panel accepts Markdown formatting. Click the ![]() (Save) icon to save your note and add it to the case.
(Save) icon to save your note and add it to the case.
-
Click the
 or
or  (Casebook App) icon in the ribbon menu or the Home icon in the Open XDR Ribbon floating button menu.
 -
In the Cases panel, click Add.

-
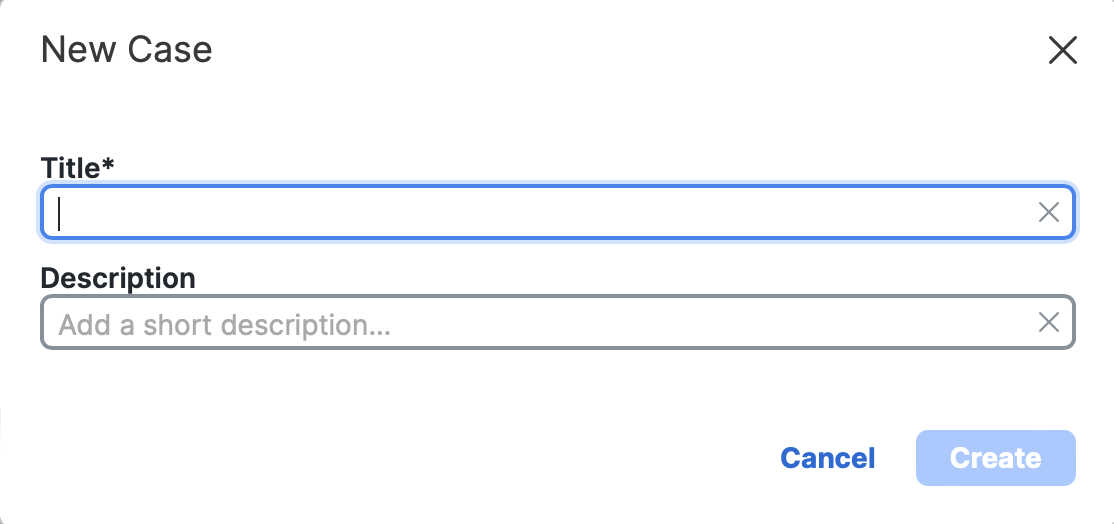
In the New Case dialog box, enter a Title, and optionally, enter a Description.
-
Click Create.
A new case is added to the list, and you can edit the Title and Summary inline in the Details panel; the edits are auto-saved.
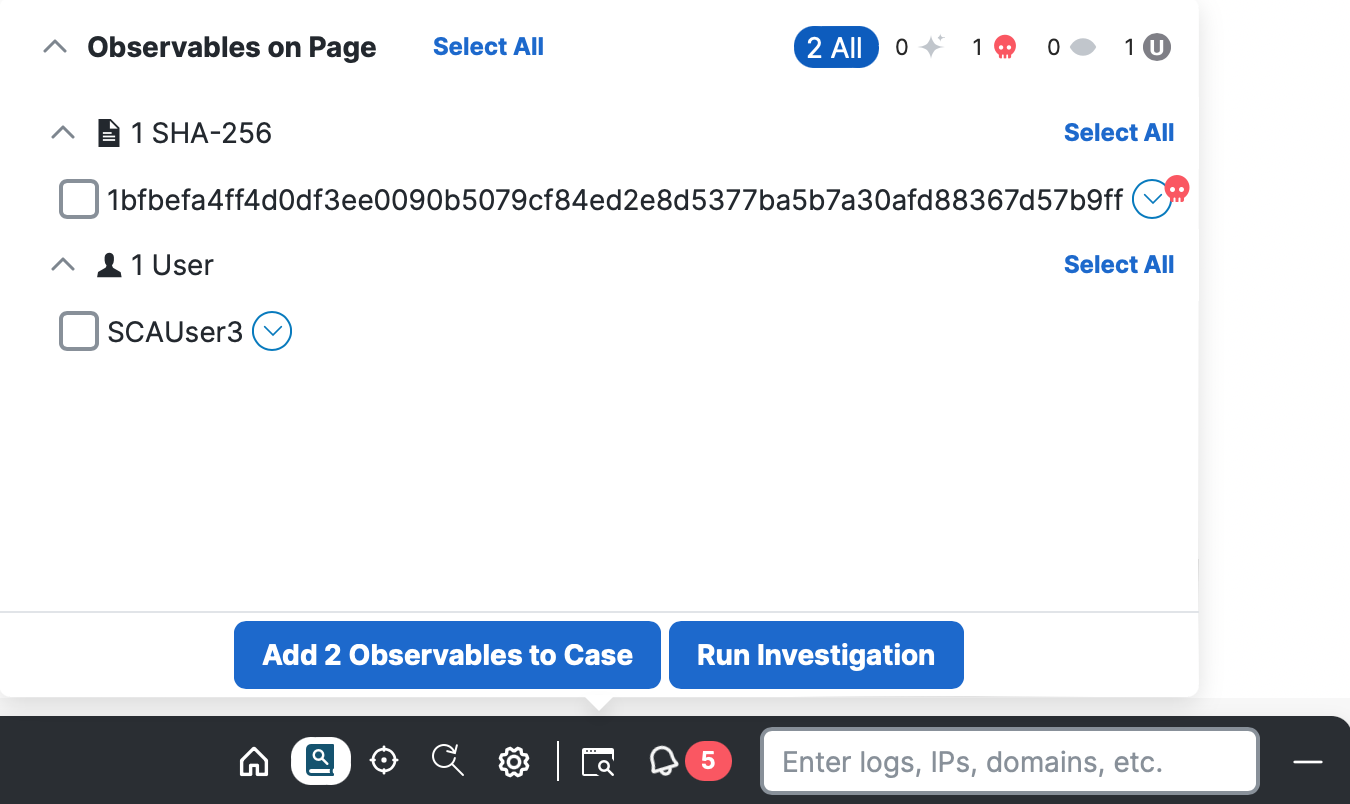
During an investigation, you can add cases to the casebook using the Observables from Text or Observables on Page popup, or from the Pivot menu.
-
In the ribbon menu, start a search for threat analysis from the Cisco XDR ribbon using the Enrichment search box or click the Find Observables icon.
-
On the Observables from Text or Observables on Page popup, check the check boxes next to the observables you want to add to the casebook, and click Add (n) Observable(s) to Case (the number of selected observables is displayed in the button).

-
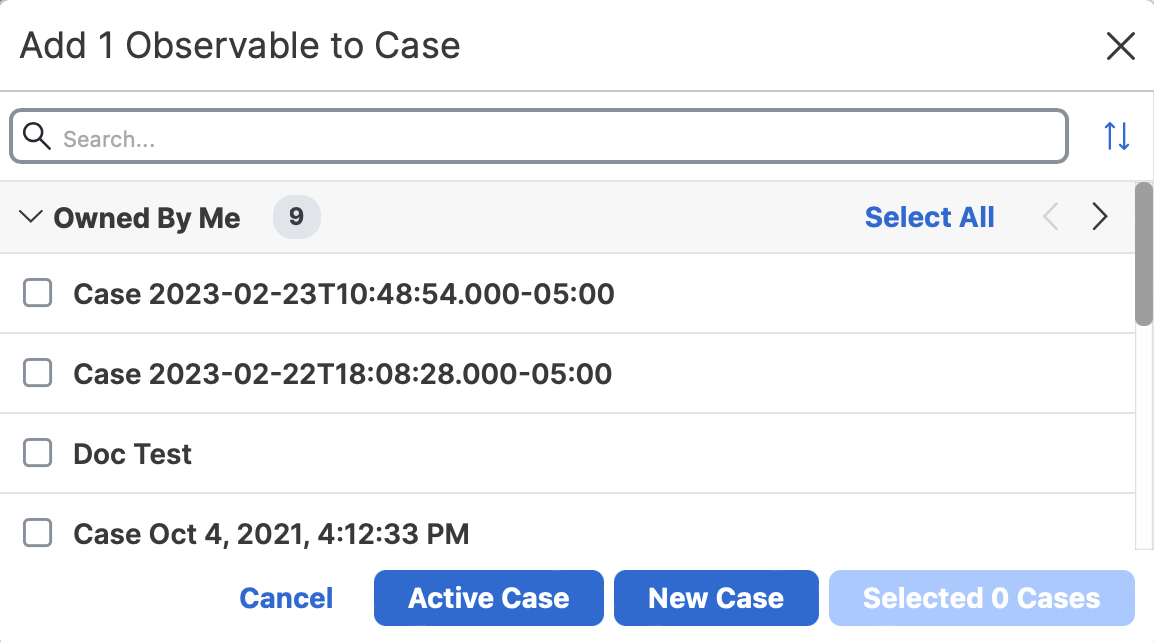
On the Add (n) Observable(s) to Case dialog, perform one of the following options to add the observables to a case in the casebook:

- Check the check boxes next to the cases and click Selected Cases to add the observables to the selected cases.
- Click Active Case to add the observables to the active case in the casebook.
- Click New Case to create a new case and add the observables to it.
If you want to further investigate the observables in the selected case, click Run Investigation to open the investigation in a new tab. For more information, see Investigate.
After a case has been added in the casebook, you can link it to an incident. An incident consists of one or more events, and the associated threat intelligence and security context that has been determined to be worthy of investigation.
In the casebook app, click Link to Incident in the upper right corner of the incident details and check the check boxes next to the incidents to which you want to link the case and click Link (n) Incidents (the number of selected incidents is displayed in the button). In the Link to Incident dialog box, you can:
-
Search Incidents - Narrow the incidents that are displayed using the Search bar at the top of the panel. The search is triggered as you enter the search criteria. The search syntax is Lucene Query Syntax and allows for free-form text search of the incident title, short_description, and description. Wildcards are also supported, and searches are not case-sensitive.
-
Sort Incidents - Click the
 (Sort) icon to sort the incidents by date.
 -
Filter Cases - Click the
 (Filters) icon and check or uncheck the Escape search term check box to specify specific fields to search. The number of selected filter criteria is displayed in the header of the filtered list.
 -
Select or Deselect All Incidents - Click Select All to check the check boxes next to all the incidents. To uncheck all the checked incidents, click Deselect All.
For more information, see Incidents.
To unlink incidents from a case, click the case from the Cases panel in casebook app and click x next to the incidents you want to unlink to the current case in the Linked Incidents area of the Overview panel.
To export a case in the casebook as a JSON file, click the ![]() (Export Case as JSON) icon on the menu bar. The case is downloaded to your computer in JSON format for you to share.
(Export Case as JSON) icon on the menu bar. The case is downloaded to your computer in JSON format for you to share.
You can delete a single case or multiple cases that are displayed on the Cases panel.
To delete a single case from the casebook, click the case you want to delete in the Cases panel and click the Delete Case icon in the upper right corner of the menu bar. On the Delete Case confirmation dialog, click Delete.

