Worklog
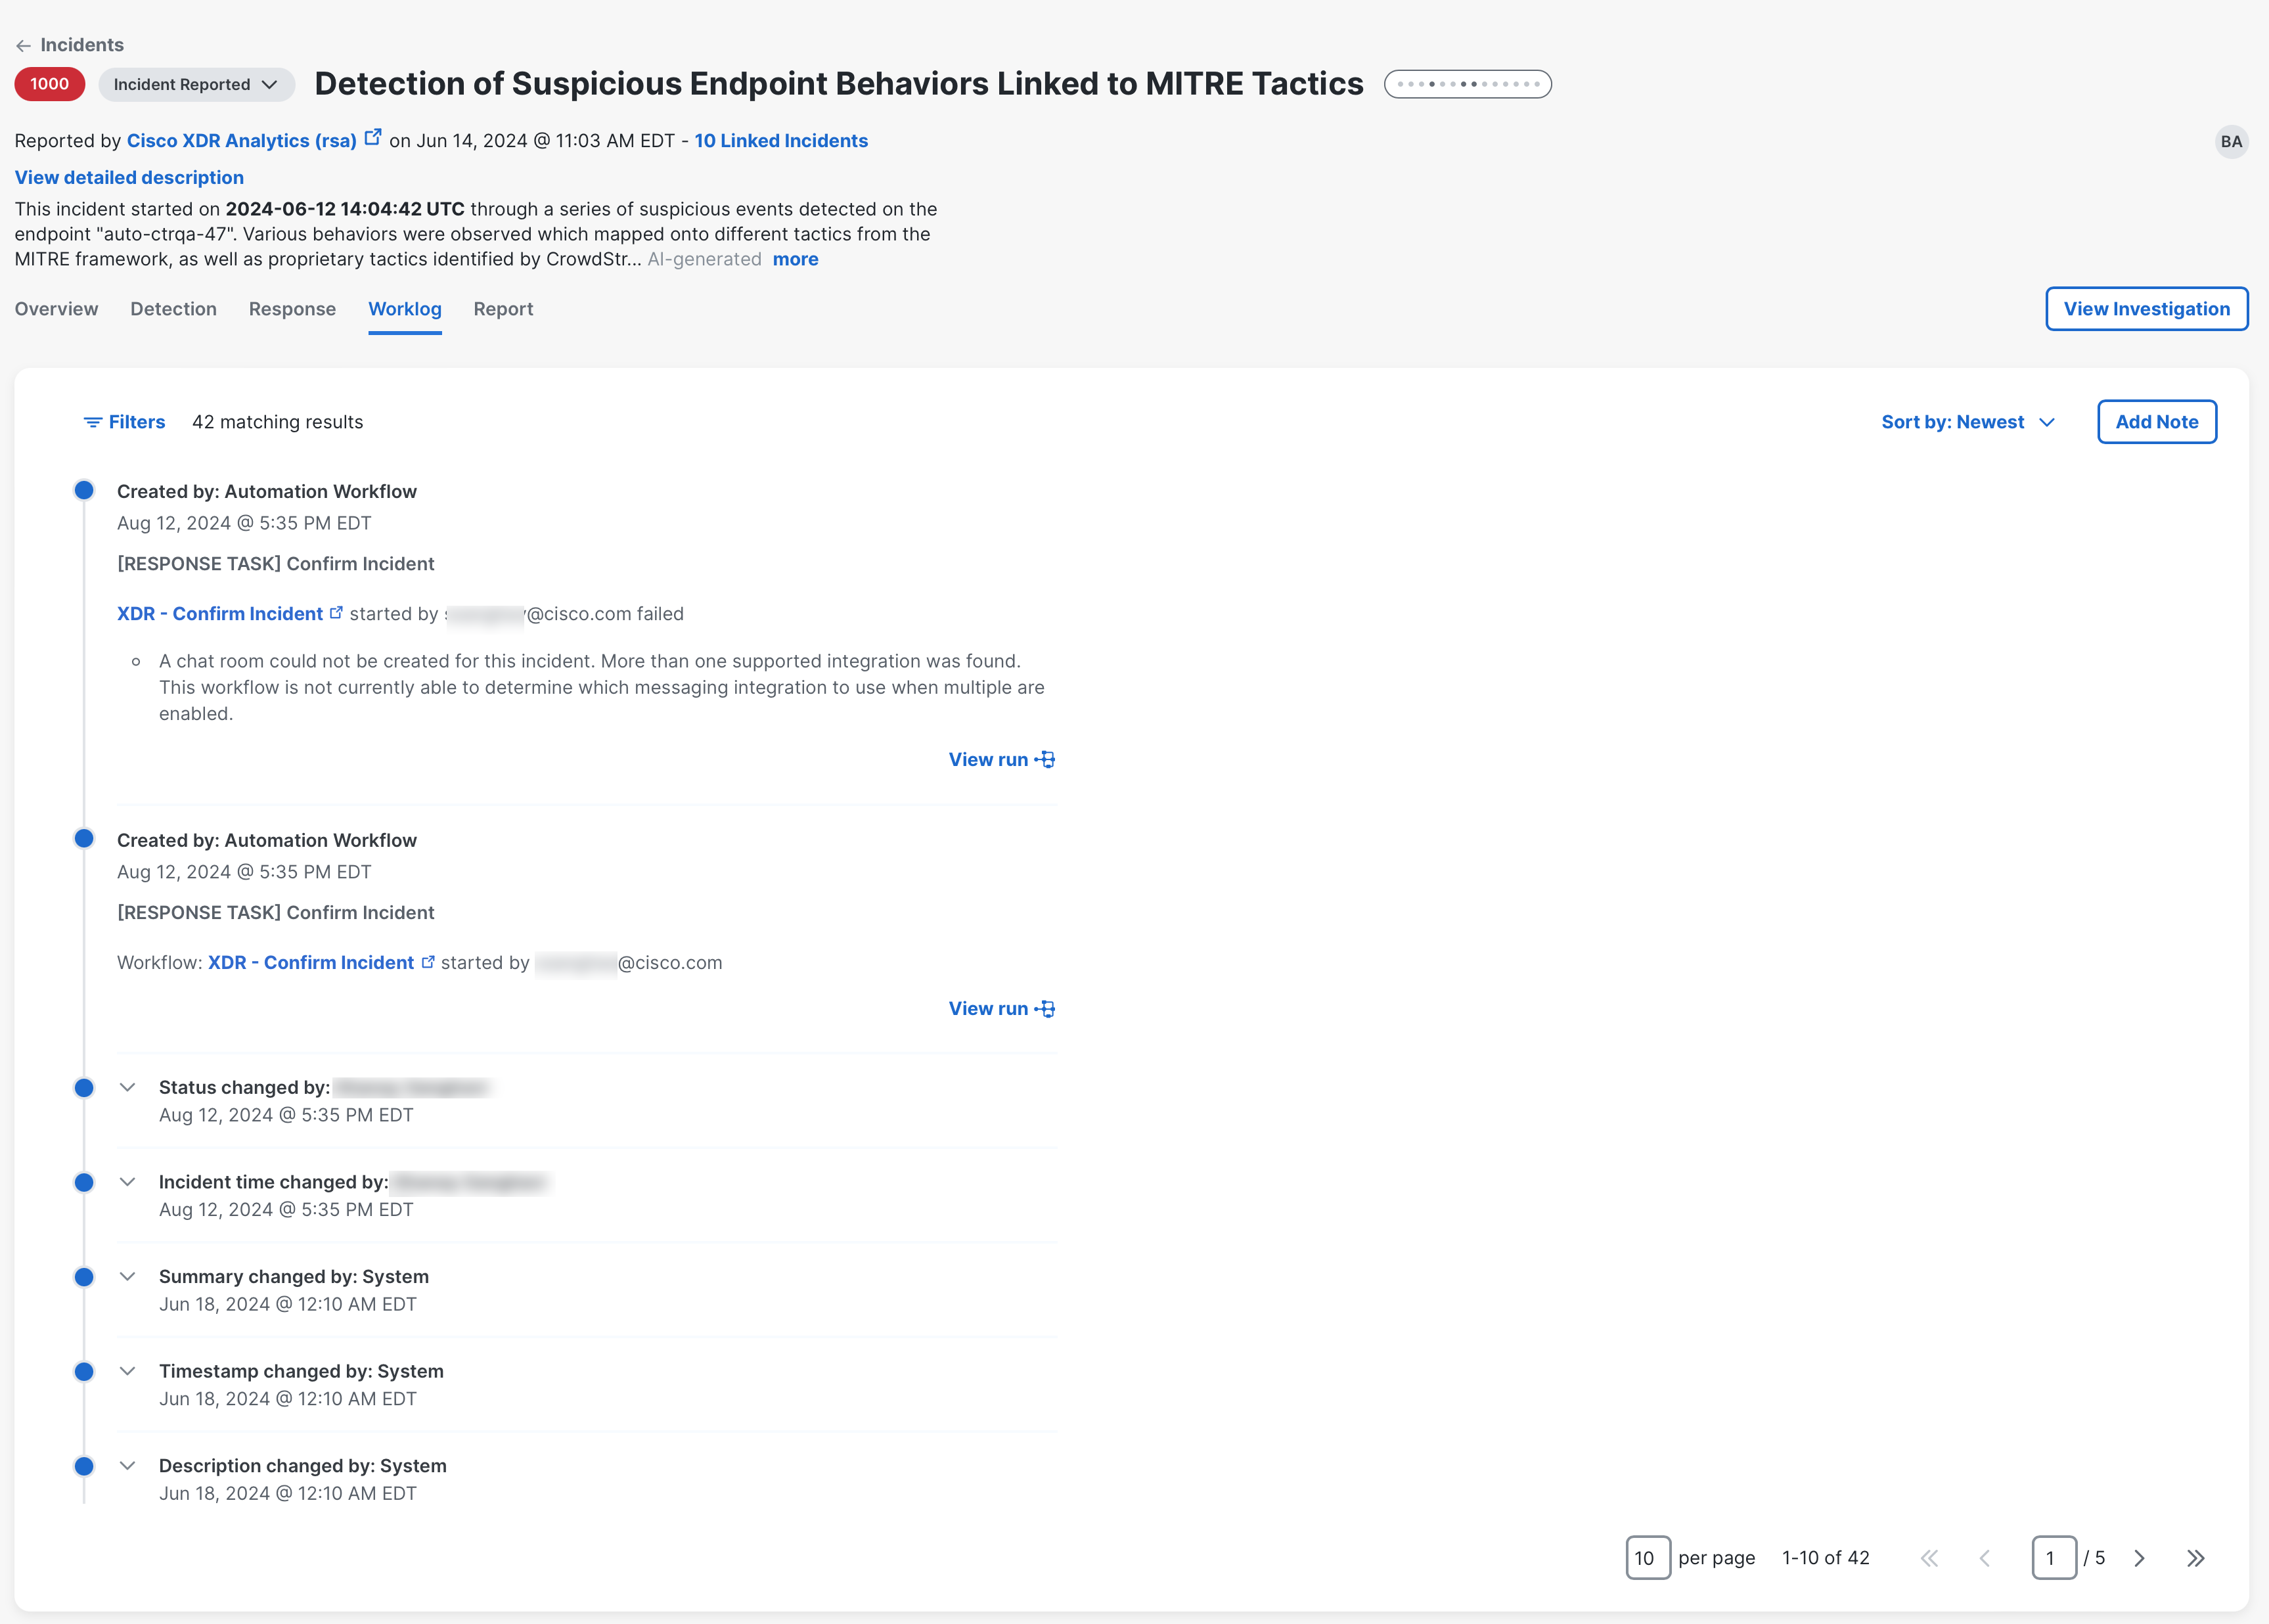
The Worklog tab in the incident detail is used to enter notes about the incident and to view the audit log of changes that have been made to the incident.
You can filter and sort the data on the page, and add a new note to the incident.
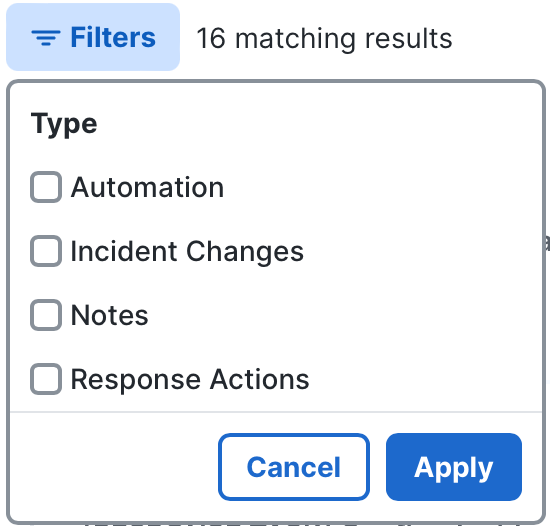
By default, all events are displayed in the Worklog tab. You can filter the display of events by clicking the Filter drop-down list and checking the check boxes for what you want to be displayed on the page.
-
Automation - Check this check box to display actions taken from automated workflows configured with Automation Rules. This includes tasks executed from the response playbook in the Response tab.
-
Forensics - Check this check box to display all the acquisition and remote shell statuses from XDR Forensics. The Evidence ID displayed is the same as the Task ID in XDR Forensics.
-
Incident Analysis - Check this check box to display the AI-generated response for Cisco Managed tasks that were automatically generated by Cisco AI.
-
Incident Changes - Check this check box to display modifications made to the incident, such as updates to the incident title, descriptions, assignments, status, and merge activity.
-
Notes - Check this check box to display all response action notes and incident notes that were AI-generated or manually added by users. These notes include:
-
Response Action Notes - These are notes generated by Cisco AI or created by users when they click Generate note or the
 (Add Note) icon for a task in the response playbook in the Response tab. In this scenario, the note is also tied to a course of action or task. The relationship between the note and task is what indicates that this is a response action note versus an incident note that has been manually entered by the user in the Worklog tab. For more information, see Add Note.
 -
Incident Notes - These are notes created by a user when the user clicks Add Note in the Worklog tab. These notes are unrelated to any response action (no relationship to any task); they are only related to the incident.
-
-
Response Actions - Check this check box to display actions that were taken from the response playbook. These response actions include:
-
Notes - These are notes generated by Cisco AI or created by a user when they click Generate note or the
 (Add Note) icon for a task in the response playbook in the Response tab. In this scenario, the note is also tied to a course of action or task. The relationship between the note and task is what indicates that this is a response action note versus an incident note that has been manually entered by the user in the Worklog tab.
 -
Workflow Logs - These are response action log entries created by an Automation workflow that is executed from the Response tab. These logs are generated by the system when the user clicks Execute for a workflow in the task.
-
The list in the Worklog tab will refresh and only display those events that match the filter criteria. The total number of match results is updated to the right of the Filter drop-down list. To remove a selected filter, uncheck the option from the Filter drop-down list and the list will refresh. To remove all the selected filters, click the ![]() (Clear) icon .
(Clear) icon .
To sort the list of data, click the Sort by filter menu and choose Sort by Newest or Sort by Oldest.
Perform the following steps to enter a new note for the incident:
-
In the Worklog tab, click Add Note to open the text editor.
-
Enter a new note about the incident using markdown or regular text. Use the formatting toolbar to format the text, if necessary. Click the
 (Live code) icon to open a pane on the right in the text box to display the text in real-time as changes are made to the markdown code on the left.
 -
Click the
 (Preview code) icon to review the note text.
 -
Click Save to add the note to the Worklog.
Note: If you navigate away from the text editor while editing, the content is automatically saved as a draft for the current browser tab only. The draft content is not available if the same session of Cisco XDR is opened in another browser tab. To restore the content, return to the text editor and continue with your edits or click Undo or Use draft to remove or restore the draft content.

