Email Rule
An Email rule allows you to monitor an inbox for new emails. When a new email arrives, and if the conditions are met, the workflow or workflows are executed.
To configure an Email rule, you need a target for the mailbox you want to monitor. This can be an IMAP Endpoint, a POP3 Endpoint or a Microsoft Graph Endpoint target (for Outlook 365). The target should be configured according to your administrator or email provider’s specifications. See the Targets topic for a link to the specific type of target you want to create.
To ensure platform integrity, there are limits set on the size of the email:
-
Up to 1 MB - Email body
-
Up to 1 MB - Email body and attachment(s) of only EML (.eml) file type
-
Up to 10 MB - Email body and attachment(s) of any other file type (or any other type in combination with EML)
Create New Email Rule
Perform the following steps to create a new Email rule:
-
In the General section, enter the following information:
-
Type - Email Rule
-
Title - A unique display name for the rule.
-
Description - Text that describes the rule, such as what it will trigger.
-
-
The toggle is switched to on by default, so when left on, the rule is enabled and the workflow can be executed. If you want to create the rule but prevent it from triggering your workflow to run, switch the Automation rule is on toggle off to disable the rule. This is useful for testing and debugging purposes.
-
In the Target section, click the Target ID drop-down list and choose an existing target or click Add New to open the New Target dialog box and configure a new target. For information on how to configure email targets, see the IMAP Endpoint Target, POP 3 Endpoint Target, or Microsoft Graph Endpoint Target Help topics.
Note: XDR Automation only supports email targets with OAuth 2.0 authentication.
-
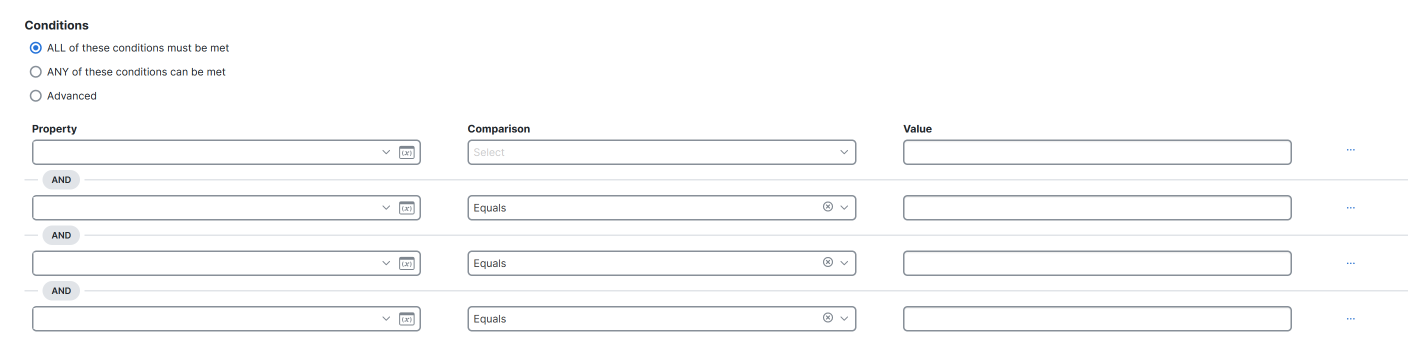
(Optional) In the Conditions section, click Add Condition to define the logic for your rule. A condition determines which emails the rule will select for processing. If no conditions are specified, all emails in the inbox will be parsed.
-
(Optional) If you add more than one condition, choose one of the following options:
-
ALL of these conditions must be met - The workflow will be triggered only if every condition is met (logical AND operator).
-
ANY of these conditions can be met - The workflow will be triggered if any of the conditions is met (inclusive OR operator).

-
Advanced - Click the operator drop-down to choose any combination of operators, in which case, it's processed sequentially, top-to-bottom.
For example: {[(condition1 AND condition2) OR condition3] AND condition4}

-
-
In the What to do with the message section:
-
Action - Click the drop-down list and choose the action to be taken when the rule parses the email:
-
Delete (Delete Message) - For POP3, all emails are downloaded and then deleted on the mail server (Inbox). You can set up the same email account using IMAP if you want to still access and manage emails on other devices using IMAP.
Warning: If you choose Delete without specifying any conditions, any emails received in the inbox of the target being monitored will be automatically deleted.
-
Read (Mark as Read) - Marks the emails as read, but does not delete them from the mail server (Inbox).
-
-
Download Attachments - Check or uncheck the check box to specify whether to download any email attachments for use within the triggered workflow. The check box is checked by default. The maximum size for downloads is 4 MB total (message and attachments). See Working with File Objects for more information.
-
-
Configure a workflow to associate with this rule.
-
In the Apply to selected workflows section, click the Select workflow drop-down and select a valid workflow or enter its name.
-
Only a non-atomic workflow can be associated to the rule directly; custom and system atomic workflows cannot.
-
The most relevant workflows to this type of rule are shown starting at the top of the drop-down list.
-
Out-of-box XDR system workflows are prefixed with a Cisco icon.
-
-
Depending on the workflow, enter the parameter data as needed. If the workflow has input variables, you can click the variable browser icon and select event input/output variables, which enable you to provide trigger-related values to the input variables as a reference.
-
To delete a workflow, click the
 (Trash Can) icon next to it.
 -
By default, the workflow is on and enabled. To disable it, switch the toggle to off.
-
-
To include additional workflows, click Add another workflow.
-
Multiple workflows will be executed in parallel, not sequentially.
-
To delete a workflow, click the
(Trash Can) icon next to it. -
If you delete a workflow from here, the actual workflow itself does not get deleted, only its association with this rule is removed. In the workflow's properties, this rule would no longer appear as a trigger.
-
-
Click Save, and a trigger for this rule is automatically added to the associated workflow (see Workflow Properties).