Create Approval Request
Note: This activity has been deprecated (release 2.36) and removed from Automation (release 2.40). It no longer works in workflows. Instead, replace it with the upgraded Request Approval activity, which combines both this and the Wait For Event activity.
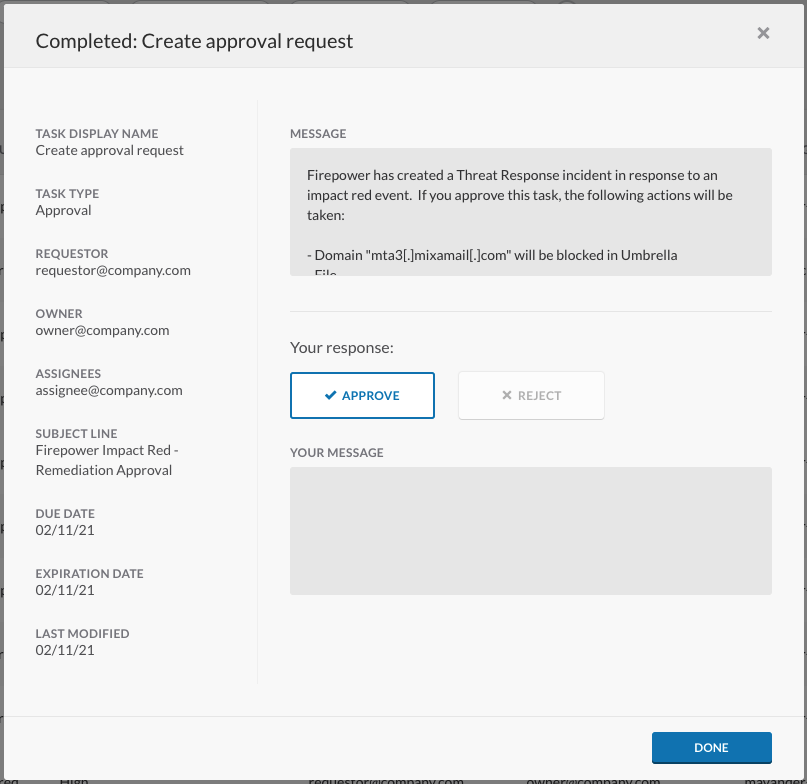
Use the Create Approval Request activity to create a task by asking a question. The question can be a simple approval or something more complex like allowing the user to select a subnet to deploy a virtual machine. To take action when the task is completed, you will need to use the Wait For Event activity or an Approval Task Rule. Creating an approval task will notify the assignees through the Notifications icon in the Cisco XDR ribbon that they have been assigned a task and provide a link to review the task and approve or reject the request.
Usage
Complete the following properties to use this activity:
- Approval Configuration - Specify the following information or click the Variable Reference icon to choose a variable:
- Task Requestor - Enter the email address of the person or team requesting the approval.
- Task Owner - Enter the email address of the person or team who owns the request (often the same as the requestor).
- Add Task Assignees - Click Add and then enter the email address(es) of the individuals who can complete the task.
- Minimum No. of Approvals - Enter the number of responses that are required before the task is considered complete.
- Priority - Click the drop-down list and choose the priority level of the request (Low, Normal, or High).
- Subject Line - Enter the subject line of the message sent to the assignee.
- Approval Message - Enter the body text of the approval message.
- Approval Choices - Click the drop-down list to choose the responses available to the assignee. The default options are Approve and Reject. You can also type your own custom responses.
- Set Task Due Date - Specify the following information or click the Variable Reference icon to choose a variable:
- Set Task Due Date - Move the slider enable or disable the task due date radio buttons:
- Specified Date - Click the radio button and enter the Due Date.
- Relative Time - Click the radio button and enter the Duration, then click the Time Units drop-down menu and select the unit.
- Set Task Due Date - Move the slider enable or disable the task due date radio buttons:
- Set Expiration Date - Specify the following information or click the Variable Reference icon to choose a variable:
- Set Expiration Date - Click the radio button beside the expiration option you want to use:
- Specified Date - Click the radio button and enter the date that the task expires.
- Relative Time - Click the radio button and enter the Duration, then click the Time Units drop-down menu and select the unit.
- Set Expiration Date - Click the radio button beside the expiration option you want to use:
- Set Status on Expiration Date - Enter the status that will be displayed after the task has expired.
Here is what a completed approval task looks like:
