Saved Investigations
You can save an investigation to keep a record for yourself and to share with others. Saved investigations can also provide evidence to justify a course of action. When saving an investigation, the investigation is assigned a unique identifier for subsequent retrieval and analysis.
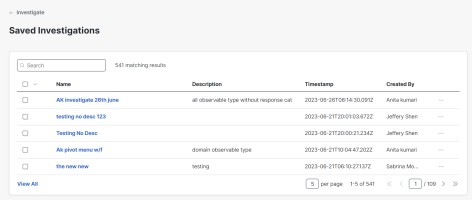
The Saved Investigations panel on the Investigate page provides a list of the investigations that have been saved in your organization (they are not private to individual users). Click View All in the lower left corner of the panel to open the Saved Investigations page to view the complete list.
The table displays the following information:
|
Column Name |
Description |
|---|---|
|
Name |
The user-specified name of the saved investigation. Click the Name to open the saved investigation on the Investigation Results page. |
|
Description |
The user-specified description of the saved investigation. |
|
Timestamp |
Date and time for when the investigation was saved or updated. |
|
Created By |
The user name of who created the saved investigation. |
|
Options Menu |
Click the |
You can specify the number of rows to be displayed on the page in the table footer.
You can search and sort the saved investigations to narrow the display.
-
Search - Enter your search criteria in the Search text box in the upper portion of the panel to search for a saved investigation using lucene syntax.
-
Sort - You can sort the saved investigations based on the date and time it was created. Click the
(Sort) icon next to the Timestamp column to sort the table by oldest or most recent created date and time.
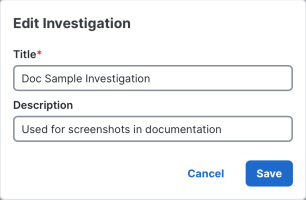
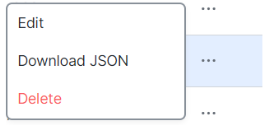
You can edit the title and description of the saved investigation by clicking the ![]() (Ellipsis) icon and choosing Edit from the drop-down menu.
(Ellipsis) icon and choosing Edit from the drop-down menu.
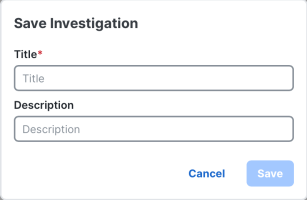
Enter a new Title and Description and then click Save.
Note: If you navigate away from the form while editing, the content is automatically saved as a draft for the current browser tab only. The draft content is not available if the same session of Cisco XDR is opened in another browser tab. To restore the content, return to the form and continue with your edits or click Undo or Use draft to remove or restore the draft content.
You can download the title and description of a saved investigation by clicking the ![]() (Ellipsis) icon and choosing Download JSON from the drop-down menu. The file is downloaded to your computer.
(Ellipsis) icon and choosing Download JSON from the drop-down menu. The file is downloaded to your computer.
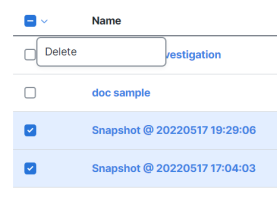
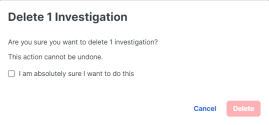
You can delete a single saved investigation from the Options menu or delete multiple saved investigations from the Selector menu.
-
In the Saved Investigations panel, use one of the following methods to delete saved investigations:
-
On the Delete Investigation confirmation dialog box, check the I am absolutely sure I want to do this check box and click Delete.
Perform the following steps to save your investigation for later reference by anyone in your organization:
-
Run an investigation on the Investigate page (see the Investigate help topic).
-
On the Investigation Results page, click Save Investigation in the upper right corner,
-
On the Save Investigation dialog box, enter a Title and Description (optional).
-
Click Save.
Note: If you navigate away from the form while editing, the content is automatically saved as a draft for the current browser tab only. The draft content is not available if the same session of Cisco XDR is opened in another browser tab. To restore the content, return to the form and continue with your edits or click Undo or Use draft to remove or restore the draft content.
The investigation is now accessible from the Saved Investigations page.
When you save an investigation, it is tied to the account you used to log in. For example, if you save an investigation while logged in using your Secure Endpoint account, it will not be available to you when you’re logged in with your Secure Malware Analytics account.
